Microsoft offers a personal message service, widely used across the globe for business and personal communication and the exchange of information. Electronic mail communication turns one way if not responded from the receiver. Also at the sender’s end, it sometimes becomes essential to ensure the delivery and receipt of information by the receiver.
To ensure the delivery and receipt of the email, Microsoft Outlook has a provision of delivery and read receipt. The sender can enable these receipts both on the desktop and on websites. This is a complete guide that explains how to enable read receipts and delivery receipts in Microsoft Outlook.
Let us see this in more detail now.
Delivery receipt ensures that the email has been successfully delivered to the receiver. This kind of receipt is not under the control of a receiver, it is automatically generated once the message has reached its destination. It confirms that the email has reached the inbox of the receiver.
Let us now see in detail how to set up the delivery and read receipt in Microsoft Outlook for a single email and for all sent emails as well.
If you want to learn more about these steps, keep reading:
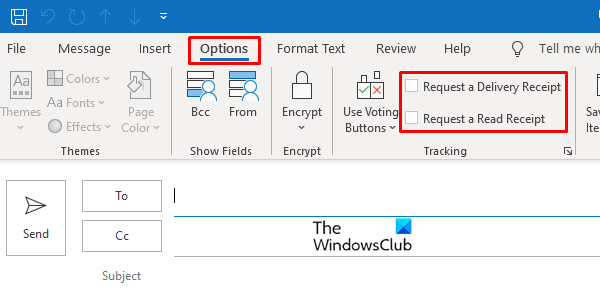
Open Microsoft Outlook account and click on the New Mail option and the left top end. Click on the Options tab.
Under the Options tab, there is the provision of Tracking, check the Request a Delivery Receipt checkbox or the Request a Read Receipt checkbox.
You can choose to operationalize either both the receipts or any one of them.
Just like the above setup to read and deliver receipts in a single email, similar action can be taken for all sent emails.
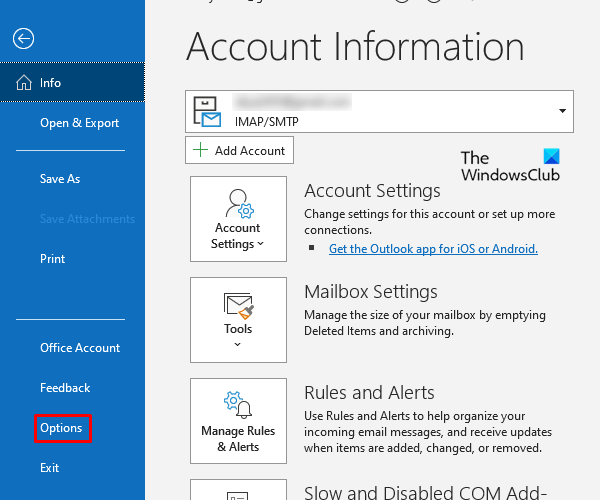
Sign in to Microsoft Outlook and click on the File option given at the top end. then click on Options from the menu bar that appeared on the screen.
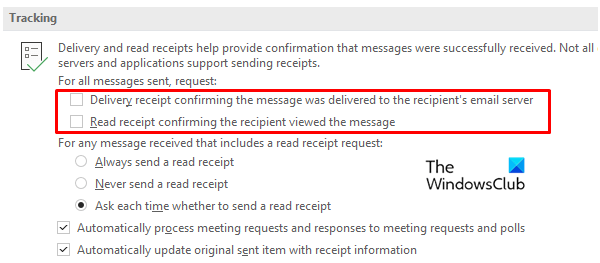
Head over to the Mail window under the Options Tab and scroll down to Tracking. Under the Tracking heading you will find the delivery and read receipt options mark on the Delivery receipt confirming the message was delivered to the recipient’s email server and Read receipt confirming the recipient viewed the message.
The above options as illustrated in the image will ensure the assigning of delivery and read receipt to all your outlook sent emails.
As discussed earlier, the receiver can choose whether to send the read receipt to the sender or not. The read receipt can be managed in both Outlook desktop application and website version.
To manage the read receipt for the desktop application, Open your Outlook account on the desktop and click on the File optional at the top left end. Go to Option > Mail.

Inside the Mail, the window looks for the tracking options and make choice out of three options of reading receipt. Mark on either Always send a read receipt, Never send a read receipt, or Ask each time whether to send a read receipt.
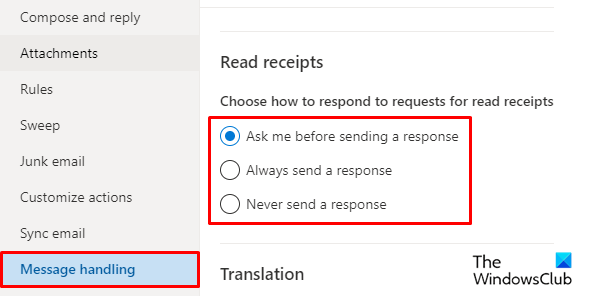
Like the above functions, the read receipts can be handled on the Outlook website also. Go to Outlook.com and then open your profile.
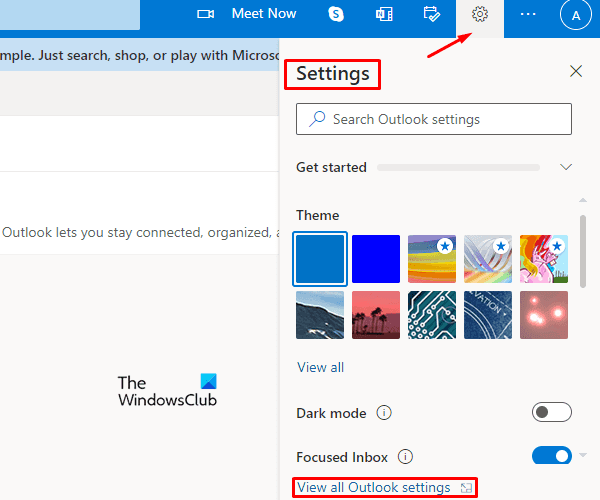
Click on the Settings option at the right end and then select View all Outlook Settings from the Menu bar.
That’s it. I hope you find this article helpful.
To get a receipt for emails sent to recipients, you have to enable the “Delivery receipt confirming the message was delivered to the recipient’s email server’ or the ‘Read receipt confirming the recipient viewed the message’ checkbox or both; when the checkboxes are enabled, the receipts will be sent to your inbox.
To activate a read receipt the message must be marked as read, which occurs when the recipients switch to another message or open the message. If you are not receiving a read receipt, it means that Outlook blocks your read receipts.
Updated on March 2, 2022 Tags: Outlook
Digvijay is a Windows enthusiast who likes to write about the Windows OS and software in specific, and technology in general. When he is not working, he would either surf the web or dives into learning tech skills.